ARI's API documents itself. Every available endpoint — the built-in ones and any added by your installed modules — is automatically described in a standard format called OpenAPI. Because the docs are generated straight from the code, they're always in sync with what ARI can actually do.
There are three ways to explore the API on your ARI instance:
| Page | Best for | URL |
|---|---|---|
| OpenAPI Spec | Machine-readable discovery — perfect for AI agents and code generators | http://localhost:3000/api/openapi.json |
| Settings → API tab | Managing API keys and seeing which endpoints are available | http://localhost:3000/settings?tab=api |
| Interactive Docs | Browse every endpoint and schema, and try out API calls directly from your browser | http://localhost:3000/api-docs |
All three pages are password protected so you'll need to be signed in to ARI to view them — or you can use a valid API key.
Interactive Docs (/api-docs)
Open http://localhost:3000/api-docs (or your deployed URL + /api-docs) for a full, browsable view of your API, powered by Scalar.
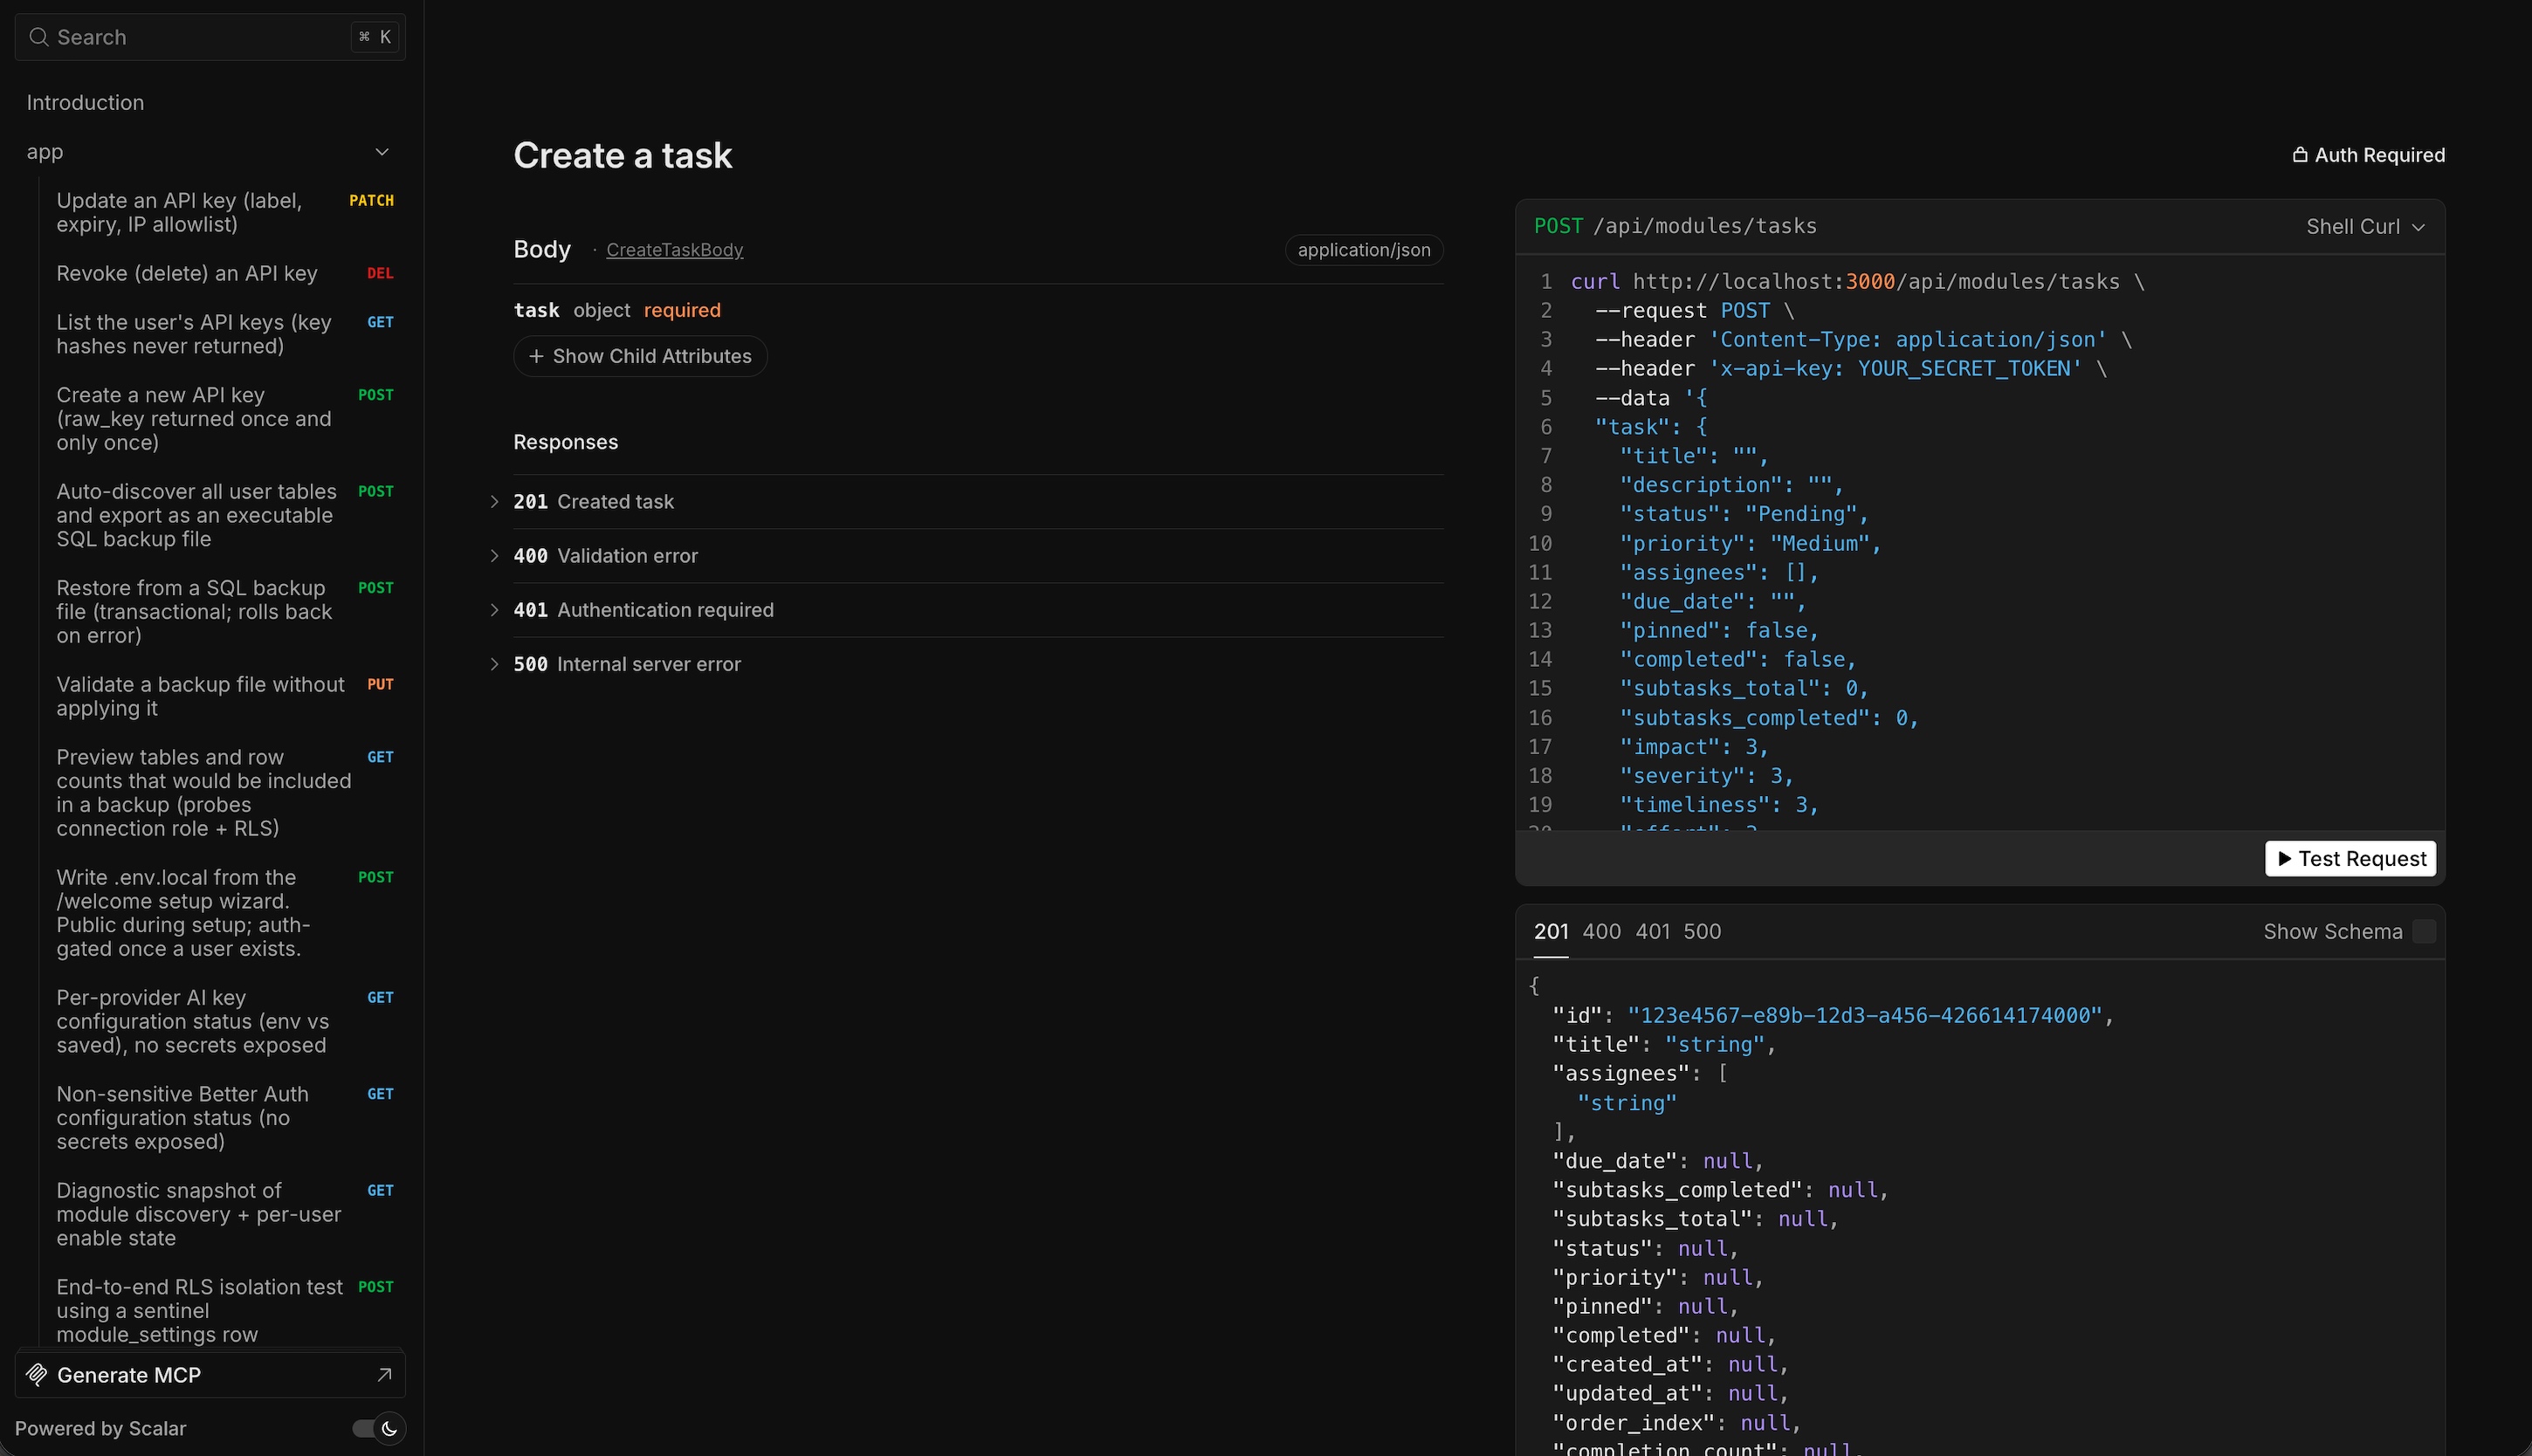
What you can do here:
- Browse every endpoint in a sidebar, organised by which part of ARI it belongs to (built-in features or specific modules)
- See exactly what each endpoint expects and returns — the inputs you can send and the data you'll get back
- Try any endpoint live — fill in the fields and hit a button to send a real request to your own ARI instance
- Copy ready-to-use code snippets in popular languages like curl, JavaScript, and Python
Because you're already signed in to ARI when you open this page in your browser, it can call the API on your behalf — no extra setup needed.
OpenAPI Spec (/api/openapi.json)
This is the raw, machine-readable description of your entire API. It's the same data the Interactive Docs page uses, but as a plain JSON file you can hand to other tools.
curl -H "x-api-key: $ARI_API_KEY" http://localhost:3000/api/openapi.json
The file contains:
- Every endpoint's address and which actions it supports (read, create, update, delete)
- What each endpoint needs as input and what it sends back
- Which endpoints require an API key or sign-in
- The base URL of your ARI instance, set automatically based on where you fetched it from
The spec is built when ARI starts and stays loaded while it's running. Your browser also caches it for 5 minutes to keep things fast.
How AI Agents Use Your API
This is the easiest way to let an AI agent (like Claude, ChatGPT, or Cursor) work directly with your ARI instance. Once it has the spec and a key, it can discover and use every endpoint on its own — without you writing any glue code.
- Create an API key in Settings → API
- Give the AI agent two things:
- The spec URL:
https://your-ari-domain/api/openapi.json - The API key (it should send the header
x-api-key: ari_k_...with every request)
- The spec URL:
- Ask the AI agent to do anything that involves ARI
Modern AI agents understand OpenAPI specs natively, so they'll figure out the right endpoint to call without any further instructions. Developers can also feed the spec to code generators to auto-create client libraries in just about any language.
Example AI agent prompt:
Here is my ARI API spec at
https://my-ari.example.com/api/openapi.json. Send every request with the headerx-api-key: ari_k_.... Show me all my tasks due this week.
The AI agent will fetch the spec, find the right endpoint for tasks, and make the call.
Settings → API Tab (/settings?tab=api)
This is the control panel for everything API-related on your ARI instance:
- Create, name, and revoke API keys — optionally with an expiry date or restrictions on which IP addresses can use them
- See usage history for each key — when it was used, from where, and how often
- Browse the list of available endpoints without leaving Settings (the same list you'd see in
/api-docs) - Jump to the Interactive Docs with a single click
Endpoints are grouped into:
- Core API Routes — built-in system endpoints (sign-in, modules, backups, and so on)
- Module API Routes — endpoints added by each installed module, labelled with the module name
When you install a new module, its endpoints appear here automatically the next time you load the page.
Authentication
Every API call needs to be authenticated. There are two ways:
| Method | How | When to use |
|---|---|---|
| Signed-in browser session | Your browser sends a cookie automatically when you're logged in to ARI | Calling the API from a page you're already viewing in your browser |
| API key | Send the header x-api-key: ari_k_... with each request | Calling from a script, AI agent, or any app outside the browser |
For everything about API keys — how to create them, set expiry dates, revoke them, and keep them safe — see API Keys.
How the spec stays accurate
The OpenAPI Spec isn't written by hand — it's generated automatically every time ARI builds or restarts:
- The same code that validates requests at runtime is also used to describe the endpoint
- A small build step collects all the endpoint descriptions into a single file
- That file is then served at
/api/openapi.json
The upshot: when a developer changes an endpoint, the docs update on the next restart. There's no separate doc to maintain, so the spec never falls out of date.
Troubleshooting
The spec page shows an error saying "Spec not generated": Restart ARI (./ari start or pnpm dev). The spec is rebuilt on each start.
/api-docs shows a blank page: Usually this means your sign-in session has expired. Sign in to ARI again and reload the page.
Some endpoints are missing from the spec: A few older routes may not yet be registered. The spec only includes endpoints that have been explicitly added to the registry — module developers can do this for their own routes by adding a small block at the top of the route file.